Showing posts with label Kids. Show all posts

Thursday, August 11, 2016

Fixate Mac & Cheese!

Macaroni and Cheese with Broccoli
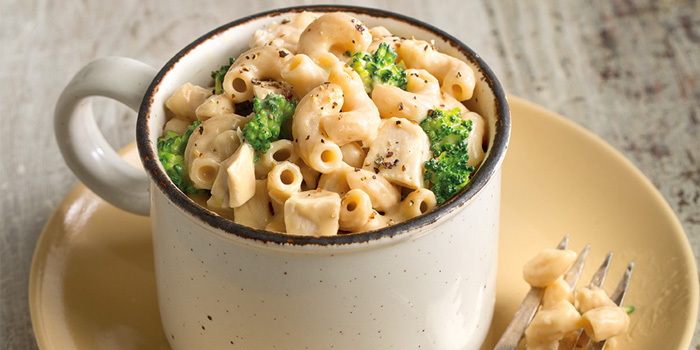
When the kids and I wanna indulge in a bowl of macaroni and cheese, this is how we do it. Not with the boxed crap....although it's much easier :). Get your fill of veggies and comfort food at the same time with this mouthwatering recipe from her FIXATE cookbook. A 21 Day Fix friendly recipe and cook book that the whole family will love!! Sharp cheddar cheese and almond milk make a creamy cheese sauce with just the right amount of gooey goodness.
Total Time: 37 min.
Prep Time: 20 min.
Cooking Time: 17 min.
Yield: 8 servings, approx. 1½ cups each
Ingredients:
4 oz. dry whole wheat elbow macaroni (or pasta)
4 tsp. organic grass-fed butter (or organic coconut oil)
2 Tbsp. unbleached whole wheat flour
1½ cups unsweetened almond milk
1¼ cups freshly grated extra-sharp cheddar cheese
3 cups cooked chopped chicken breast, boneless, skinless
6 cups chopped broccoli florets, steamed
1 tsp. sea salt (or Himalayan salt)
½ tsp. ground black pepper
Preparation:
1. Cook macaroni according to package directions. (Do not use salt or oil if suggested in directions.) Set aside.
2. Melt butter in large saucepan over medium heat.
3. Add flour; cook, whisking constantly, for 1 minute, or until brown (don’t let it burn).
4. Slowly whisk in almond milk; cook, whisking constantly, for 1 to 2 minutes, or until mixture thickens and there are no lumps.
5. Reduce heat to low. Add cheese; cook, whisking constantly, for 2 to 3 minutes, or until melted.
6. Add chicken, broccoli, salt, and pepper; cook, stirring constantly, for 1 minute, or until heated through.
7. Serve immediately.
Tips and Variations:
• Use quinoa pasta and gluten-free flour if you’re following a gluten-free lifestyle.
• Asparagus, green beans or Brussels sprouts can be substituted for broccoli.
• A combination of cheeses like cheddar and Gouda, cheddar and Monterey jack, and cheddar and Asiago can be substituted for sharp cheddar.
Macaroni and Cheese with Broccoli

Thursday, June 9, 2016

Food Dyes and Why You Should Remove Them From Yours and Your Family's Diet


See the chicken on the left? If you can't tell, it has an orange color to it. The one on the right doesn't. I had to special order the one on the right and request it WITHOUT food coloring.
I'm glad I asked because if not, I would've been feeding my family something I am strictly against in all of our diets.

While we donest very clean, we also enjoy burgers, fries, pizza and other foods on occasion. What I do NOT however have nor allow my kids to have artificial food dyes.

After severe behavioral issues with my daughter, tantrums, teachers saying she may have ADHD I started researching and quickly learned about the effects of artificial food dyes. When we eliminated the dyes, her behavior COMPLETELY changed and she no longer has tantrums, outbursts or problems in class.

Every year, food manufacturers pour 15 million pounds of artificial food dyes into U.S. foods.
Some of the most commonly used food dyes may be linked to numerous forms of cancer, along with hyperactivity and other behavioral problems in children.

While Europe has recently placed regulations on labeling food dyes to inform consumers of the health risks, the United States has no such requirement.

Red #40 
This is the most-widely used and consumed dye. It may accelerate the appearance of immune system tumors in mice. It also causes hypersensitivity (allergy-like) reactions in some consumers and might trigger hyperactivity in children. What it's in: Beverages, bakery goods, dessert powders, candies, cereals, foods, drugs, and cosmetics

Red #3 
Recognized in 1990 by the FDA as a thyroid carcinogen in animals and is banned in cosmetics and externally applied drugs. What it's in: Sausage casings, oral medication, maraschino cherries, baked goods, and candies.

Blue #1 
An unpublished study suggested the possibility that Blue 1 caused kidney tumors in mice. What it's in: Baked goods, beverages, desert powders, candies, cereal, drugs, and other products.

Blue #2 
Causes a statistically significant incidence of tumors, particularly brain gliomas, in male rats. What it's in: Colored beverages, candies, pet food, & other food and drugs.

Citrus Red #2
It's toxic to rodents at modest levels and caused tumors of the urinary bladder and possibly other organs. What it's in: Skins of Florida oranges.

Green #3
Caused significant increases in bladder and testes tumors in male rats. What it's in: Drugs, personal care products, cosmetic products except in eye area, candies, beverages, ice cream, sorbet, ingested drugs, lipsticks, and externally applied cosmetics.

Yellow #5 
Yellow 5 causes sometimes-severe hypersensitivity reactions and might trigger hyperactivity and other behavioral effects in children. What it's in: Pet foods, numerous bakery goods, beverages, dessert powders, candies, cereals, gelatin desserts, and many other foods, as well as pharmaceuticals and cosmetics.

Yellow #6 
Caused adrenal tumors in animals and occasionally causes severe hypersensitivity reactions. What it's in: Color bakery goods, cereals, beverages, dessert powders, candies, gelatin deserts, sausage, cosmetics, and drugs.

Every year, food manufacturers pour 15 million pounds of artificial food dyes into U.S. foods -- and that amount only factors in eight different varieties, according to the Center for Science in the Public Interest (CSPI).

These dyes are so common in U.S. foods -- especially kids' foods -- that parents don't think twice about giving their children rainbow-colored cereal or fluorescent blue "juice," and adults don't consider bright orange cheese puffs out of the ordinary, either.

But you might do a double take if these food packages contained warnings detailing what these artificial food colorings may really be doing to your health, and that of your children.

In Europe at least, they do. As of July 2010, most foods in the EU that contain artificial food dyes were labeled with warning labels1 stating the food "may have an adverse effect on activity and attention in children." The British government also asked that food manufacturers remove most artificial colors from foods back in 2009.

In the United States, however, consumers are still snatching up artificially colored foods with fervor, as most are completely unaware of the risks involved … and let me just say, hyperactivity in children is only the tip of the iceberg.

Cancer and Other Serious Risks from Food Dyes Revealed
In CSPI's summary of studies on food dyes2, you can see that some of the most commonly used food dyes may be linked to numerous forms of cancer. CSPI reported3:

"The three most widely used dyes, Red 40, Yellow 5, and Yellow 6, are contaminated with known carcinogens … Another dye, Red 3, has been acknowledged for years by the Food and Drug Administration to be a carcinogen, yet is still in the food supply."

In their 58-page report, "Food Dyes: A Rainbow of Risks," CSPI revealed that nine of the food dyes currently approved for use in the United States are linked to health issues ranging from cancer and hyperactivity to allergy-like reactions -- and these results were from studies conducted by the chemical industry itself.

For instance, Red # 40, which is the most widely used dye, may accelerate the appearance of immune system tumors in mice, while also triggering hyperactivity in children.

Blue # 2, used in candies, beverages, pet foods and more, was linked to brain tumors. And Yellow 5, used in baked goods, candies, cereal and more, may not only be contaminated with several cancer-causing chemicals, but it's also linked to hyperactivity, hypersensitivity and other behavioral effects in children.

In addition to considerations of organ damage, cancer, birth defects, and allergic reactions, mixtures of dyes (and Yellow 5 tested alone) cause hyperactivity and other behavioral problems in some children.
Because of those toxicological considerations, including carcinogenicity, hypersensitivity reactions, and behavioral effects, food dyes cannot be considered safe. The FDA should ban food dyes, which serve no purpose other than a cosmetic effect, though quirks in the law make it difficult to do so (the law should be amended to make it no more difficult to ban food colorings than other food additives).
In the meantime, companies voluntarily should replace dyes with safer, natural colorings."

Remember Why Food Colorings Are Added to Foods in the First Place …
If you need further incentive to ditch artificially colored foods from your diet, remember the reason they're added to processed foods in the first place: to make a food that would otherwise be an off-colored mess look appealing.

When foods are processed not only are valuable nutrients lost and fibers removed, but the texture, natural variation and flavors are lost also. After processing, what's actually left behind is a bland, uninteresting "pseudo-food" that most people would find entirely unappetizing.
So at this point, food manufacturers must add back in the nutrients, flavor, color and texture in order to make them desirable, and this is why they become loaded with food additives.

Most commonly, additives are included to:

  • Slow spoilage
  • Prevent fats and oils from becoming rancid or developing an off-flavor
  • Prevent cut fruits from turning brown
  • Fortify or enrich the food with synthetic vitamins and minerals (which are lost during processing)
  • Improve taste, texture, and appearance

In the case of kids' foods, bright colors are also added to attract kids' attention and make the foods appear "fun." But in most cases, if a food comes in an outrageous color that is not found in nature, consuming it is not a good idea.

Take one carefully designed, randomized, double-blind, placebo-controlled study published in the journal The Lancet5. It concluded that a variety of common food dyes, and the preservative sodium benzoate -- found in many soft drinks, fruit juices and salad dressings -- do in fact cause some children to become measurably more hyperactive and distractible.

The study also found that the E-numbered food dyes do as much damage to children's brains as lead in gasoline, resulting in a significant reduction in IQ.

The results of this study were what prompted the British Food Standards Agency (FSA) to issue an immediate advisory to parents, warning them to limit their children's intake of additives if they notice an effect on behavior. As mentioned earlier, they also advised the food industry to voluntarily remove the six food dyes named in the study back in 2009, and replace them with natural alternatives if possible.

The United States, however, has not followed suit in issuing any similar warnings to American parents, even now two years later.

Stick to Naturally Colored Foods for Your Health
Let me make it clear that your diet should include a range of vibrantly colored foods … but these foods should be the ones that are naturally rich in color. Red bell peppers, purple eggplant, green spinach, blueberries and rainbow chard are all examples of healthy foods whose bright colors are signs of the important nutrients they contain.

These are the food colors you need in your diet … not the man-made varieties found in most processed foods. The good news is avoiding artificial food dyes is incredibly easy -- just stick to whole fresh foods and avoid the processed ones. If you need help breaking an addiction to processed foods, these seven steps will help you wean off of them in favor of healthier, unprocessed, natural alternatives.

For the complete article and more information, go to Mercola's article on it which is where I found this excerpt and the information. This is the link

Monday, May 30, 2016

My Latest Favorite Gadget! The Foreo Issa Hybrid!


If you know me, you know I love my gadgets! Gadgets for the kitchen, the RV, my workouts and especially beauty gadgets! Not much of a make up kind of girl but I enjoy trying out new gadgets that help with hygiene, skin care and dental care! White, clean, healthy teeth are a must and I've been on the hunt for a really good electric toothbrush since I bought my first one about 10  years ago.

In that time span, I've tried pretty much every type of Sonicare, Oral B and Phillips electric toothbrush and I haven't been too impressed with any of them.  One of my biggest pet peeves is the battery life. It only lasts a few uses and I always had to keep the charger on my bathroom counter tops which, for this OCD girl, is not a good thing!  Other pet peeves were the head softening up in just a few weeks and needing replacement and water and mold collecting between the head and the base no matter how much I rinsed it.

So, with that said, I've been on the search for a solid electric toothrush for SOME time now and I was elated when I came across the FOREO!  It  has a unique design that's much more compact than the typical electric toothbrush and they make different versions of it for every member of your family! I have the ISSA Hybrid but they also carry a standard Foreo ISSA and even an ISSA Mini for kids that I can't wait to check out too! That's next on my list of gadget purchases!

So, why do I love this toothbrush so much and plan on getting one for each member of my family? Here are just a few of the reasons!

SUPER Long Battery Life
1.  One of my favorite aspects is the battery life and charge time!  Where as most electric toothbrushes have to be charged up every few days, the FOREO ISSA lasts for up to 365 uses!  If you brush two times per day, this means you only have to charge it twice a year! Say what???? That makes this girl SUPER happy. Charger is put away beneath the sink and I can keep my toothbrush in the medicine cabinet until it's next use!  Another perk to this is that I can travel with it without having to worry about bringing the charger and cord with me. We travel often so this is a big bonus!


Silicone and Standard Bristles
2.  The combination of silicone and PBT polymer bristles in the ISSA Hybrid is something I've never tried in a toothbrush before and at first, I wasn't too sure how I'd feel about it. But after trying it, I love the way it feels and cleans my teeth and so do my kids after trying mine.  The silicone bristles are not as abrasive as standard bristles on electric toothbrushes yet they're effective in cleaning teeth without damaging the gums. The silicone bristles are also a better choice hygienically when compared to standard bristles because they aren't porous and harbor less bacteria due to their natural properties.

Sleek Design
3. The ISSA Hybrid's design is another favorite.  It's much smaller than the other electric toothbrushes on the market today and easier to hold.  It is also designed in a similar fashion to dentist tools where the top comes off easily with a pull and there's no gap or area for water or mold to collect.

Vibrations
4. One of the main reasons to get an electric toothbrush is for the vibrations.  They help reach deeper around teeth and inside crevices and help loosen plaque. With most standard electric toothbrushes, there are just one to three settings at most.  The ISSA Hybrid has 8 levels of intensity so you find your level of comfort easily with the + or - buttons on the base.  The ISSA Hybrid will even remember your preference for the next time you use it! Another bonus, especially for those of us that can brush our teeth for an hour if I don't pay attention, the ISSA Hybrid shuts off after 3 minutes to prevent overuse.

Waterproof
5.  Last but not least, I LOVE that it's completely waterproof unlike my last 2 electric toothbrushes. All you do is seal the charging port and you can keep it in the shower since you don't nee do charge it for up to 6 months!  Now that is something that really sold me on it since I brush my teeth in the shower 90% of the time!

So, for those of you looking to check out a new gadget and especially if you care about your dental hygiene (and really, how can you now???) give the FOREO a try!  You'll save a lot of time and money too since the heads only need to be replaced once or twice per year where as the others need replacing every few months, if not more often!

For 15% off PLUS free shipping to check out any of the Foreo ISSAs or ISSA Minis, use ISSA05BB through June 30, 2016!

And if you have babies in the home, you can take advantage of a special promotion that won't be available for long! You can get an ISSA toothbrush + a Hybrid head + an ISAA Mikro AND 2 chargers!  All for $169! Check out the micro and get the deal here ===>>> ISSA Micro

Tuesday, October 20, 2015

13 Super Cute and Healthy Halloween Snacks!

Candy corn, chocolate bars, caramel apples and so many other sugary treats are front-and-center at Halloween, even before the trick-or-treating begins! If you want to get into the holiday spirit in a healthier way, here are some easy-to-make Halloween snacks we found that kids (and grown-up kids) will love.
What are your favorite healthy Halloween snacks?

Jack-o’-Lantern Fruit Cups
Add color and fun to your Halloween with these smiling jack-o’-lantern faces carved into navel oranges. Slice off the tops of the oranges, scoop out the pulp, use a paring knife to cut out jack-o’-lantern faces, and fill with grapes and/or mixed berries.Jack O' Lantern Fruit Cups Halloween Snack
 
Orange You Lovin’ Fall Fruit Salad
Save the pulp from your jack-o’-lantern fruit cups to make this fruit salad. Fill small mason jars with pineapple slices, orange wedges, and top with Greek yogurt.
Fruit salad candy corn Halloween Snack

Slithering Snake Dip
Eek! What is lurking in your hummus? A slithering snake made from black olives! Cute Food for Kids carved beady eyes from string cheese and added a carrot tongue. Even those who hate serpents will love this little guy.
Snake in Hummus Halloween Snack
 
Candy Corn Popsicles
Here’s a healthier spin on candy corn! These colorful homemade popsicles are made from pineapple juice, orange juice, and yogurt. We want the popsicles! Click here to get the recipe.
Candy Corn Popsicles Halloween Snack
Mummified Apples
Googly eyes and gauze tape turn green apples into mummies that are almost too cute to bite into.
Mummy Apples Halloween Snack
 
Monster Pie
Kids will love this Monsters, Inc. tart because it’s so darn cute, and well, because it’s dessert! Visit Creative and Healthy Fun Food to get this recipe that’s got a filling made from avocado, banana, and almond milk!
Monster Pie Halloween Snack
 
Spooky Spider Eggs
Deviled eggs get extra creepy-crawly when they’re topped with spiders. To make eight scary spider eggs, cut 12 black olives in half vertically. Place one half in the center of each egg to form the body, then slice each remaining olive half into four sections to create legs. Shiver.

Ghoulish Hard-Boiled Eggs
Let your kids in on the decorating fun! Use black foodsafe ink pens to draw ghostly faces on white hard-boiled eggs. This example from Wit & Whistle shows how simple – and cute! – each drawing can be.
Ghoulish Hard Boiled Eggs Halloween Snack
Frankenstein’s Monster
Is this a trick or a treat? This veggie tray made to look like Frankenstein’s monster is a little bit of both. Let your kids play with their food to help create this healthy platter and they might just be tricked into eating their veggies.
Frankenstein Veggies Halloween Snack
 
Eyeball Pasta
Start off a night of trick-or-treating with this clever eyeball pasta! Visit Spend with Pennies to see how she used string cheese, black olives, and a straw to create eyeballs of different sizes that stare out of ghoulishly green spinach pasta.
Eyeball Pasta Halloween Snack
 
Jack-o-’Lantern Clementines
Pick up a foodsafe pen and the whole family can have fun decorating the skin of clementines, tangerines, or oranges with spooky or smiling faces. Pop these into lunch boxes the week leading up to Halloween.
Jack O' Lanterns drawn on clementines Halloween Snack
 
Pumpkin Veggie Tray
This veggie platter is a Halloween party essential! Mom Endeavors shares some tips for constructing this spooky pumpkin from baby carrots and black olives. The stem can be made from broccoli, the end of cucumber, or a celery stick. Serve with Slithering Snake Dip!
Carrot Jack O' Lantern Veggie Tray Halloween Snack
Banana Ghosts and Orange Pumpkins
Boo! Turn bananas into spooky ghosts with chocolate chip eyes and mouths made from chocolate covered raisins. Make a pumpkin patch out of peeled clementines or tangerines. Just use a sprig of celery in the center for the stem!
Banana ghosts and clementine pumpkins Halloween Snack

Via the Team Beachbody blog with photos by Mom Endeavors, Princess and the Frog Blog, Spend with Pennies, Blue Skies Ahead, Wit & Whistle, Creative and Healthy Fun Food, Marci Combs, Chew Chew Mama, Cute Food for Kids, Frugal Coupon Living and Amanda Meixner!

Monday, October 12, 2015

How to Avoid Getting Sick & Helping Get Rid of It If You Do!

person with flu
You’ve been taking your vitamins, avoiding your sniffly friends, and washing your hands. But despite your best efforts, you can tell you’re coming down with a cold. Luckily, you can take a few simple steps to nip it in the bud — or at least speed up your recovery so it doesn’t ruin your whole week and you can do it all without taking prescription medication.

I'm big on going the holistic route before I try any medications and I'm the same way with my kids. 90% of the time, we avoid getting sick all together (thanks to Shakeology!!) and to be honest, none of us got sick this last year at all.  Bit, if you do end up catching the big, here’s how to get rid of it— according to someone in the know: Dr. Scott Helmers, an urgent care physician for the Mayo Clinic Health System.

1. Hydrate.
Your mom was right: You need your fluids. Hydration helps your body fire on all cylinders, but it’s especially important when you’re battling a cold. A cup of warm water or hot tea can soothe a scratchy throat, and the fluids will thin out your mucus, so you won’t feel as stuffy. Water, juice, or broth will do the trick, and you don’t need to overthink the number of ounces. “It’s really just a matter of satisfying your thirst — maybe have an extra glass of fluid every couple of hours,” says Dr. Helmers.


2. Eat for wellness.
Vitamins and minerals are beneficial to your overall health, but it’s debatable whether any particular one will ward off a cold or reduce its duration. Your best bet is to focus on eating healthy foods and eliminating anything that might make you feel even more sluggish, like alcohol or greasy foods. “It’s not that those would impair your ability to fight it off; it would just be compounding the symptoms,” Dr. Helmers says. In other words, if your head’s already pounding from sinus pressure, a night of Fireball shots probably won’t improve things.

3. Adjust your workout accordingly.
If you feel like you have enough energy to go for a jog or do some light lifting, go for it. Just listen to your body and don’t work out to the point of exhaustion. (And for the love of Typhoid Mary, wipe down your equipment after you use it.) “Pay attention to what your body is telling you,” Dr. Helmers says. “Moderate activity may help with muscle soreness that might accompany an upper respiratory infection. On the other hand, if you’re a runner or biker, pay attention to the ambient conditions — if it’s really cold, it may end up making you feel worse. There’s no great advantage in tiring yourself out.” And if you have a fever, discomfort in your chest, or difficulty breathing, skip it.

4. Sleep it off.
A good night of shut-eye can help shut down a cold before it really ruins your plans. “Rest according to what your body is saying it needs, and be sure to hydrate when you wake up,” Dr. Helmers says.

5. Reach for the right remedies. 
Stocking up on cold meds could leave you with a case of sticker shock to go along with your stuffy nose — and it probably won’t make you feel better any sooner. “Scientifically, we probably can’t prove that antihistamines, decongestants, and [over-the-counter] cough medicine shorten the illness,” Dr. Helmers says. Still, there are a few simple ways to soothe your symptoms (and you probably already have what you need at home!).


  • Salt water. Dissolve 1/2 tsp. of salt in a cup of warm water, then gargle and rinse to ease irritation in your throat.
  • Honey. If you can’t stop coughing, try 2 tsp. of honey. A pediatric study in 2012 found honey to be an effective cough suppressant.
  • Pain relievers. Plain old acetaminophen or ibuprofen can combat inflammation and achy muscles.

If you stay healthy, manage your symptoms, and rest when you need it, you may be able to reduce the amount of time you’re under the weather. But how do you know when it’s time to give up and go to the doctor? “Most colds run their course in 3-5 days,” Dr. Helmers says. “If it’s going much beyond that — or if you have a very high

fever, chest congestion, intensely sore throat, or facial pain — then it’s appropriate to be examined.”

Via the Team Beachbody Blog

Monday, November 17, 2014

21 Day Fix Approved Sweet Treat! Popcorn!

Healthy and Yummy Afterschool Treat for the Kids
AND Sweet Snack for the Adults!

3 cups Non-GMO Popcorn
1 tsp Coconut Oil
1/2 tsp Cinnamon
1/4 tsp Nutmeg
1 tsp Coconut Oil1/2 tsp Cinnamon1/4 tsp Nutmeg
Blend together and serve!  

Tuesday, September 2, 2014

Teach Your Kids Everything They Need to Know for Pre-K and Kinder with School Sparks


One other resource that I found invaluable for teaching your kids at home is the School Sparks website.  This website was designed by a former teacher and has thousands of worksheets on every topic you could imagine (including auditory processing, reading comprehension, fine motor skills and even holiday worksheets!)  One of the best ways to get your kids interested in learning at home is by starting with the holiday worksheets.  They are more interesting to them, more colorful and they get them into the spirit of the season.  Since we're in October, take a look at their Halloween worksheets and print some out at home to get your kids started. Click the link to get to the worksheets that you can print for FREE!


If you like the site, you may want to save money and order all of their worksheets in a bound book.  It includes over 450 of their best worksheets for only $28.  A great deal that was an excellent resource for me as well as many other mom friends that ordered it.  And by the way, I was not paid or compensated in any way to write this review on School Sparks.  I simply loved the site and had to tell other moms about it.  So check it out and use it with your kids. You'll be benefiting them more than you know and you'll be saving money on preschool too!


Thursday, June 5, 2014

Baby Food 101: Part 1


When it came time to start solids with my little one, I knew I was going to do the same thing I did with my first baby.  I was going to make his food and feed him homemade little meals just like the rest of the family eats.  Sure, it's easier to buy the store bought food in the little glass jars or the popular pouches, but something about those doesn't sit well with me.  I did buy a few of the jars of baby food to have on hand for emergencies (since they have a much longer shelf life than homemade food so they're excellent for emergency kits) but I only plan to use those if I have absolutely have to.  I did the same with my oldest (5 years ago) while working full time and then some so I know it's possible to do it again.  

For some, making baby food at home can be intimidating but, in reality, it's very simple. In the beginning, you start off with the basic veggies (i.e., carrots, squash, sweet potato, peas, green beans) and you build up from there.  Eventually you introduce proteins such as egg, chicken, red mean, etc and fruits as well.  With my daughter, I waited until she was almost a year old and had tried virtually every vegetable and protein before I introduced fruit.  Why you ask?  Because fruit is sweet and the taste is very appetizing when compared to carrots, peas or green beans. Many moms I've talked to have found that, after introducing fruits, their kids no longer like the veggies and refuse to eat them.  So, I waited on the fruits with my oldest and it worked out well. She LOVES fruit but LOVES her veggies just as much and will still eat them plain, steamed, raw and any other way I serve them at almost 6 years old.  

So, back to the topic of actually making your own baby food.  When starting solids, some start with rice or oatmeal cereal and others start with veggies. I started with the veggies because the rice and oatmeal cereal can be a little difficult for little bellies to digest and, depending on the baby, it can constipate them as well.  You can also add a little bit of the fortified oatmeal cereal (or rice cereal if you prefer) to your veggies to give them some extra nutrients and DHA.  My favorite oatmeal cereal and the only one I buy for my babies is the Happy Bellies.  It's organic and includes plenty of extras such as DHA, Choline and probiotics to promote a healthy digestive system. It's sold at Whole Foods and Target but you can also get it online at sites such as Diapers.com.  

When you decide to start veggies, go to the store and buy a few of each of the following:  carrots, sweet potatoes, squash, bag of frozen peas, bag of frozen green beans and avocados.  These are all easy vegetables to start with and easy ones to make at home with a basic blender as well.  Sure a Blendtech or Vitamix will make things MUCH easier but you can get by with a basic blender as well.  There are baby food making machines out there too (such as Baby Bullet and Beaba Babycook) but I am not a fan of those.  The jars they come with are small and you can't make a large quantity in them if you choose to plan ahead and freeze the food (which is fine & just as healthy).  The baby food making machines can also cost upwards of $150 so using a basic blender will save you some money too!  

For storing your homemade baby foods, you have plenty of options.  Below are some ways moms I know have stored their homemade baby food:

  • Small plastic Tupperware type containers
  • Ice cube trays
  • Baby food storage trays sold separately matching machines (from Baby Bullet & Beaba)
  • Baby food storage containers (OXO & Cuisinart make great ones)
  • Empty, washed & sterilized glass baby food jars
  • Small Gladware containers (disposable type of plastic storage containers)


 My favorite way to store my homemade baby food and the least expensive way is empty baby food jars. I bought 50 of them for $3.00 from a local mom that was getting rid of them and it is plenty for me to store the food I make and have enough to last me about a month. That is about how long I keep frozen baby food for but I have kept it up to 3 months in the past.  When I defrost it, I do so by leaving it in the refrigerator overnight and, by morning, it's ready to eat.  It's tastes just as good as it did when I prepared it and baby loves it the same :) If I make the baby food and end up having a lot more than expected left over, I either put it in ice cube trays or in larger containers.  I don't like the ice cube trays much because you can take the food with you as you can when it's pre-packaged in small, sealed containers but they are a good option if you stay home a lot and feed baby at home.  

So, if you have a little one that is almost ready for solids, give homemade baby food a shot!  It's not very difficult and the recipes are basic enough that anyone can make it. It's as simple as peeling a vegetable, boiling it, dicing it & putting it in the blender!  I'll be posting some of my baby food recipes on here shortly so follow the blog to get updates on when a new post is up!! Thanks for visiting!

Sunday, April 27, 2014

NO-Mess Sand! Yes It Really Does Exist!


 Yesterday my family and I decided to venture down to the Santa Monica Promenade since it was a nice (but windy) day in So Cal.  One that wasn't too hot or crowded since it's not yet the summer months. Anyway, we went into the Brookstone store and saw this incredible "Sand" that all of us fell in love with!  It's a 98% sand with 2% polymer blend that makes that sand sort of stick together. It never dries out (as long as it is used then put back in the jar), dust free, gluten free, easy to clean and the options for pretend play are endless!

It feels like moist stand and does not separate much or stick to your hands. It's sort of like a granular play dough and my daughter wouldn't put it down.  She played with it for at least 30 minutes and it never got on her clothes, the counter or her hands.  Brookstone kept it in a small wooden sand box that they also sell.  The sand itself is $20 for the 2.2lb jar or $14.99 for the 1lb jar.  The 1lb jar is also on sale for 2 for $25 but the large 2.2 lb jar is still a better deal.

I am a major neat freak and not a fan of sand at all. It creates a mess whether kids play with it inside or out but THIS stuff was incredible.  I am planning on buying a few of the larger jars for my daughter soon and will add some follow up pics and an additional review.  I would have bought it yesterday but we are the type of parents that don't buy her stuff all the time.  It has to be her birthday or Christmas or she has to earn it (i.e., by reading a new book, doing all of her chores for the week, getting all of the stars on her behavior chart, etc).  So, if you are looking for a new toy or pretend play stuff for your kids, this  "sand" is excellent.  Kids can use cookie cutters or sand toys from the dollar store and create shapes, castles and anything else they want with it.  An excellent alternative to a doll, car or video game!  This free flowing sand is also great for sensory therapy.  This product was designed for Fine Motor, Sensory, and Cognitive Development.

Tuesday, October 1, 2013

Get Your Children Ahead Before They Even Start Kinder!

As the proud mother of an amazing 4 year old, I want nothing more than to watch my daughter succeed in life.  That is one of the reasons I decided to start working with her on learning her shapes, colors, numbers, letters and more as early as 2 years old.  By the time she was 3, she was already writing her name, reading sight words and doing basic math.  Now at 4, she's already reading at 1st grade level, adding, subtracting, telling time and TONS more.  And she's not even in kindergarten yet.

There has long been an argument between mom friends of mine whether you should or should not work with your child in order to help him or her get a head before they start kinder.  Some moms say not to do it because the child will then be bored when they start school.  I do not believe this at all.  As a former teacher, I loved when my students came into class prepared and already had the foundation for what they were going to learn.  I saw that they had more confidence when it came to school work and learning new things that they were not already exposed to.  If you have kids at home, it would benefit them to spend at least 15-30 minutes per day working on educational topics that they will see in the upcoming school year.  This will not only prepare them, it will give them extra confidence and a step ahead so the school year is not so challenging.  Standards are getting increasingly more difficult so it would benefit us to help them.

Now, as a former teacher, it is not difficult for me to find resources to teach my daughter. For some moms, though, it can be tough to decide what resources to use and where to get them.  I got a lot of my books at the dollar stores (the 99 Cent Store & the Dollar Tree).  I also purchased some of the curriculum books at Costco.  I got large books there that included every topic (letters, numbers, sentences, reading comprehension, math, etc) for less than $10.  Costco also has 20 book sets of BOB books which are EXCELLENT for teaching reading. Those were key in helping my daughter learn her sight words and begin reading independently.

For other educational tools to teach your kids, click on the "Education" tab at www.FitFluentialMom.com.  There you will find reviews on other educational products and websites you can use to teach your kids at home ;)

Monday, September 30, 2013

Cupcake Crayons Made Out of Crayon Scraps


 If you have young children, you surely have your fair share of broken crayon pieces around the house.  Instead of throwing them away, recycle them and make fun cupcake crayons they can reuse.  Not only are these fun for them to use, they can be made in any color combination you want.  They are also the ideal shape for smaller tots that have a difficult time grasping a standard crayon.  If you don't happen to have broken crayon pieces, I'm sure your children's teachers at school, church or day care have some you can use for this craft.  Promise your kids will love it!  Follow the steps below:


What You Will Need
--Broken crayon pieces
--Mini cupcake tin
--Mini cupcake liners


Steps
1) First you'll have to remove the paper off each of the crayon pieces. This is definitely the most labor intensive part of this project.  My daughter (4 years old) was at it for almost an hour with me.  She was so excited to make her cupcake crayons, though, that she didn't care! LOL 
2) After peeling them all, we broke the larger pieces into smaller pieces that would better fit into each mini cupcake tin.  

3) After breaking down all of the crayons, we put 2 liners in each of the cupcake tin spots.  If you only put one, the crayons will leak through and it will be difficult to clean and reuse for actual baking next time. You can also use the foil liners.  They are thicker and the crayons don't bleed through them like they do the thin paper ones.

4) After you've lined the tin, turn the oven on to 200 degrees.  It won't take long to heat to such a low temperature so I usually wait until this step to even turn it on.

5) Once the oven is on,  add the crayons to the cupcake tin in any combination you'd like.  You can make some solid color crayons and you can mix colors as well.  We kept color families together but made some cool combinations as well (orange + yellow, red + purple, blue & green, red + orange, multi-color).
6) After the tin is full and/or you're out of crayon pieces, place the muffin pan in the oven and "cook" for about 10-15 minutes.  Watch them carefully so they do not overheat or burn.  The smell is not great but it will be worse if they burn.  They will also stick more to the pan.

7) When you remove them, make sure to do it carefully and slowly.  The crayons will be a thin, watery liquid consistency and can spill easily.  Let them cool for about 30 minutes and remove them from the tin.  
8) After they have completely cooled, remove the cupcake paper/foil wrappers and they're ready to be used! 
 
My daughter absolutely loves them and doesn't even want to use her regular crayons anymore.  


Tuesday, September 4, 2012

Lights, Camera, Party! A New Family Game on Playstation!


Games that feature a variety of mini games incorporated into it seem to be the ideal choice for families. Compilation games such as Lights, Camera, Party! From Frima Studio is the latest of these games released on the PlayStation Network using the PS Move. Mini-games such as this tend offer something for everyone. The family can all play together and, most of the time, there’s little, if any, violence. There are also a variety of animated avatars to choose from, spiking interest in even your youngest family members. Now, getting beyond the type of game it is, let’s get into the real review. Is it something you should buy for your family?

Lights, Camera, Party! is geared towards families to play as a group, laugh and have fun. It cannot be played individually unless it’s play in challenge mode. The purpose of the game is to be played in groups of up to 5 to encourage competition and laughter frantically passing the one controller back and forth to each other. As with many games, you have to play a lot in order to unlock more games. There's not a lot of games unlocked when you first get the game but, once you unlock the rest (a total of 50 all together), you’ll have plenty of variety to entertain a good crowd. There are 5 avatars but, in party mode, up to 8 can play and there will be avatars repeated. Not a big deal but it’d be nice if there were at least enough avatars for the number of players that are play together.

The main characters (avatars) in Lights, Camera, Party! are the Funzini family. The games is based around their story and the day their life changed. They were hanging out in their yard when a tv satellite falls into their yard and crashed into their home. The tv studio owner tries to make amends with the family by inviting them to participate in a game show on his network. The game show features lots of wacky games that you as the player get to play! The prize for the Funzinis if they win is a dream house!

In the game, players compete against one another in a variety of mini games. The games are played with one shared Move controller. The game is divided into rounds and, whoever wins the round wins the chance to design a portion of the house with their selected character in mind. For example, Billy Funzini is a fan of cowboys so his room would be western themed.

There are 5 characters to choose from. When you chose a character, that character’s face will be on your profile in story mode and will be used to style the sections of the house that you choose. There are different modes to play in as well. In story mode, up to four players can play together. If you have a larger group, choose party mode where up to 8 players can play.

Each of the mini-games is played as most motion initiated games are played. Players move the control up and down, they rotate it, they swing it and they do whatever they need to in order to win that round. The game is similar to most PS Move, Xbox Kinect or Wii game involving motion controls and, honestly, this game doesn’t have anything unique about it that hasn’t been done before. Having had the Wii for several years before trying this game out, however, I was impressed by the response in the motion controls. They respond very well and as accurately as you could expect.

In addition to the usual shaking all around as with most motion games, with Lights, Camera, Party! players also have to perform some tasks that include motor skills including placing blocks into corresponding holes of the same shape and matching shapes and other somewhat educational attributes to it.
The game itself is fairly simple to play. Each game and mode is thoroughly described prior to the game starting. The games are all directed by an announcer that will guide you through and continue to “cheer you on” throughout. The game encourages competition between the crowd, cheering you on as you play. The ability to beat high scores on each of the events played keeps the intensity up and the boredom away, at least until each player masters the game.

Overall, my family and I found the game to be quite entertaining. The graphics are great, the story is funny and the competition is definitely there. It’s a fast paced set of games offering variety to keep players from getting bored. The whole game takes approximately 30 minutes to play and the mini-games are short. The more games you unlock, the less repetition there will be. Once all 50 games are unlocked, Lights, Camera, Party! seems like a game my family (and our guests) can enjoy for quite a long time.

Thursday, August 30, 2012

5 Ways to Spend Better Time with Your Kid


As a parent, we always wish we had 48 hours in the day instead of 24! More quality time with our kids would be a treat for any family! I know for me, between work, housekeeping, homework, dance, swim, karate and soccer, I hardly have time to think…and I only have one 3 year old! I honestly don’t know how some parents with 2 or more kids do it, especially working full time! This thought is what has sparked some creativity in me! I’ve had to come up with creative ways to get things done while also incorporating my kids into the activities to allow for quality family time! I wanted to “spend better time” with my kids! Below are some issues many of my mom & dad friends complain they “don’t have time for”. Try them out and see how your day CAN include your entire to do list and your kiddos too!


1. I can’t exercise, I don’t have time! Your kids LOVE to be outside (usually) so, take them out on their bikes, roller blades or skateboards and keep up with them with a slow jog. Your kids are too young to ride a bike, put them in a jogging stroller and get to pushin’! Not only will you get a good workout jogging but the pushing will tone your arms! Too hot or too cold to go outside, pop in a workout video or go online to some of the many sites that offer free, short daily workouts! Do them while your little ones are napping or early in the morning when your family is still catchin’ zzzs!
2. I don’t have time to cook It’s true, when you get home at 6pm, there’s hardly time to shower, not to mention busting out the cookbook and apron and sweating it out in the kitchen. After all, dinner is supposed to be at 6-7pm not 6-7am! So, why not take an hour or two out of your weekend and make dinners for the week! Freeze them up in different containers, label them Monday – Friday and pop them in the freezer. When you get home from work, soccer practice, parent conference or just come home early in tired, pop it in and your home cooked meal is ready in 2-5 minutes!
3. I don’t have time for myself Many parents, mostly moms but some dads too, complain they never have time for themselves. They don’t have time to get nails done, get their hair cut or just treat themselves with a well deserved massage. Well, many spas and salons offer packages for mommy & me and daddy & me! Take your kids and turn it into a bonding activity! It will make your little ones feel extra special, especially if there are siblings involved and they can each have their own day.
4. I need alone time with my spouse but don’t have anyone to watch my kids Well, that’s a problem many of us have. Recently some friends and I have gotten together and developed a calendar. Two to four times a month we have one of the parents watch all of the kids for 3-4 hours. The rest of the parents go out for a parents’ night out! We take turns so we all get our night out and our kids get the fun with friends they love! Local indoor gyms and studios like My Gym also offer Parents Nights Out. You pay a fee, usually between $25-35 per child (with siblings at a discount rate) and they’ll watch your kids for 3-4 hours, feed them dinner and show them a good time!
5. I don’t even have time to clean the house Ok, so, few kids like to clean but, it’s all part of growing up. We all have to learn to take care of our possessions and take pride in our home. Starting early and teaching kids to help out is not a crime nor will it hurt your child’s upbringing. If you have toddlers, teach them where their toys go and to put them away (with help from you in the beginning). If you constantly clean up after them, that’s all they’ll know and you’ll end up doing the cleaning for many years to come. Elementary age kids can be given an incentive to help out. They can earn an allowance like a salary that we earn at work. Their room should be clean without compensation since it’s their own space (like our house is ours and we have to maintain it). If they help out maintaining the rest of the home by dusting, vacuuming or cleaning some windows, reward them in some way. Activities are usually a good option to money, like a day at the park or a trip to your local museum! You can also check out www.myjobchart.com. It’s an excellent online chore chart that teaches your kids to earn, save & spend and best of all it’s FREE!
So, you didn’t think it was doable but it is! You just have to make do with what you have and get creative to spend better time!
The Parent Center also writes for Playground Dad! Check out his blog & our article there!

5 Ways to Spend Better Time with Your Kids

Wednesday, June 1, 2011

Zearly: Revolutionizing Kids Clothing!

How would you like a FREE wardrobe for your child?

Ever heard of Zearly? If you haven’t, you have to check them out! They’re a kids’ clothing site where you can literally get a whole new wardrobe for your kids for FREE! And they’ll help you clean out their closets at the same time! Zearly works like this! First, you sign up on their website and they automatically send you out a huge, postage paid bag to fill with all of your childrens’ gently used clothing. You don’t even have to take the bag to the post office because Zearly arranges for the bag to be picked up right from your front door. Once the bag arrives at Zearly headquarters, our staff goes through the clothing, tallies up the points and credits your account with points for each item you send in. When your points appear on your account, it’s time to start shopping. There are clothes ranging from 0-3 months all the way up to 14/16 on Zearly. We even have shoes! There are gently used clothes AND brand new designer apparel too! If you spend over 150 points, your order ships to your house free! That means the entire transaction will cost you nothing, not even the time or gas it takes to get to your nearest consignment store.

AND if your kids have outgrown these sizes and you no longer need to shop for kids’ clothes, you can STILL send in your clothes because, at Zearly, you can also use your points towards gift cards to Target, Walmart, Amazon & other retailers. So, you can actually get yourself some clothes in exchange for clothes that no longer fit your kids. How can you not like this site? So far, the reviews are all 5 stars! Moms and dads are raving about it so check it out!

Zearly also has a Facebook page where they post tons of links and articles related to family life such as recipes, family activities, freebies, giveaways and more! There’s even a chance to win 50 Zearly points each week! Like them on facebook and follow them on Twitter for more information!

Below are just some of the reviews from their Facebook Reviews page! See what other moms and dads have to say about Zearly!

  • "" LOVE IT! I spent about 192 points, and got my sons entire summer wardrobe. And the best part was, i didn't spend a dime. If i would've bought everything i got brand new, it would have been close to $300 dollars, if not more...love, love, love saving money anyway i can!!

    "" If I could give you 10 stars I would... This is an incredible store! I just received my 1st bag of 36 clothing items for only 196 points... and they are all perfect! Thanks SO much Zearly! I will definately be buying MANY more!!

    "" Love the whole concept of your business! I have really been impressed with the items we have received from you. Thanks!

    "" I LOVE Zearly!! Excellent idea and excellent service. I've received two shipments already :-) We'll be customers for a LONG time!!

    "" Got my first shipment in! Awesome stuff and awesome concept. This mother of 5(all 6 and under!) approves! Two thumbs up!