Candy corn, chocolate bars, caramel apples and so many other sugary treats are front-and-center at Halloween, even before the trick-or-treating begins! If you want to get into the holiday spirit in a healthier way, here are some easy-to-make Halloween snacks we found that kids (and grown-up kids) will love.
What are your favorite healthy Halloween snacks?
Jack-o’-Lantern Fruit Cups
Add color and fun to your Halloween with these smiling jack-o’-lantern faces carved into navel oranges. Slice off the tops of the oranges, scoop out the pulp, use a paring knife to cut out jack-o’-lantern faces, and fill with grapes and/or mixed berries.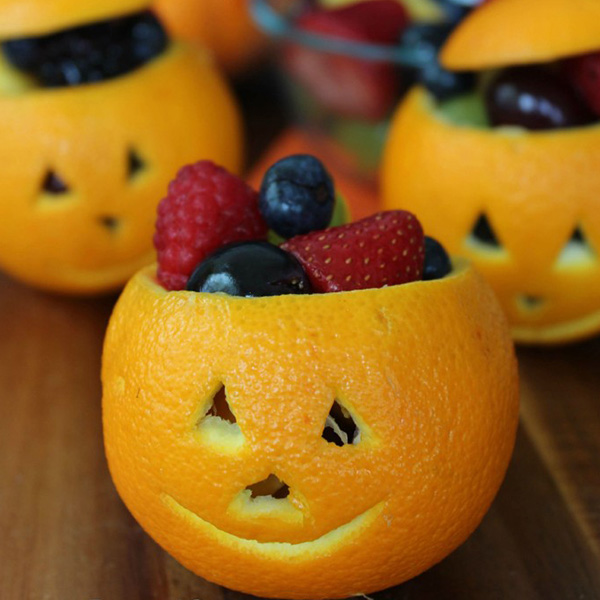
Add color and fun to your Halloween with these smiling jack-o’-lantern faces carved into navel oranges. Slice off the tops of the oranges, scoop out the pulp, use a paring knife to cut out jack-o’-lantern faces, and fill with grapes and/or mixed berries.
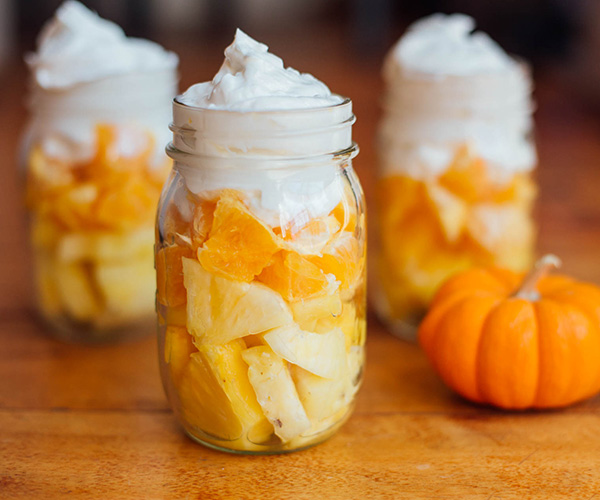
Orange You Lovin’ Fall Fruit Salad
Save the pulp from your jack-o’-lantern fruit cups to make this fruit salad. Fill small mason jars with pineapple slices, orange wedges, and top with Greek yogurt.
Save the pulp from your jack-o’-lantern fruit cups to make this fruit salad. Fill small mason jars with pineapple slices, orange wedges, and top with Greek yogurt.
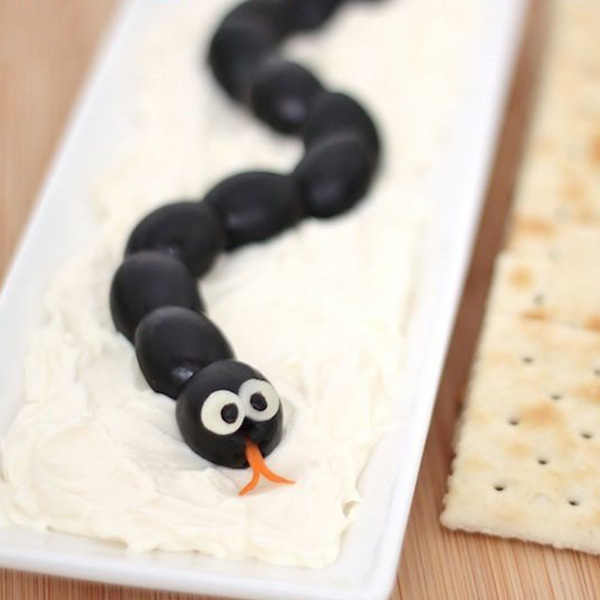
Slithering Snake Dip
Eek! What is lurking in your hummus? A slithering snake made from black olives! Cute Food for Kids carved beady eyes from string cheese and added a carrot tongue. Even those who hate serpents will love this little guy.
Eek! What is lurking in your hummus? A slithering snake made from black olives! Cute Food for Kids carved beady eyes from string cheese and added a carrot tongue. Even those who hate serpents will love this little guy.
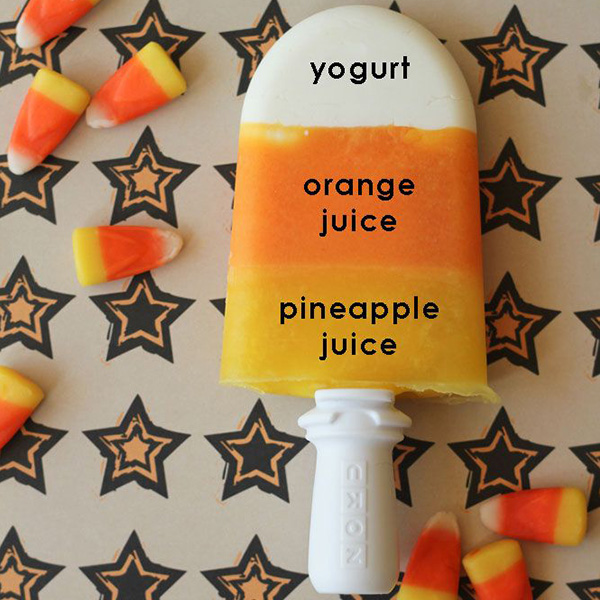
Candy Corn Popsicles
Here’s a healthier spin on candy corn! These colorful homemade popsicles are made from pineapple juice, orange juice, and yogurt. We want the popsicles! Click here to get the recipe.
Here’s a healthier spin on candy corn! These colorful homemade popsicles are made from pineapple juice, orange juice, and yogurt. We want the popsicles! Click here to get the recipe.
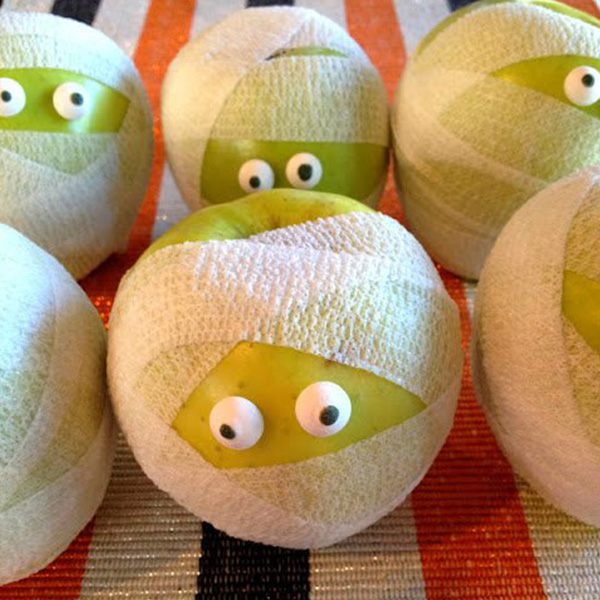
Mummified Apples
Googly eyes and gauze tape turn green apples into mummies that are almost too cute to bite into.
Googly eyes and gauze tape turn green apples into mummies that are almost too cute to bite into.
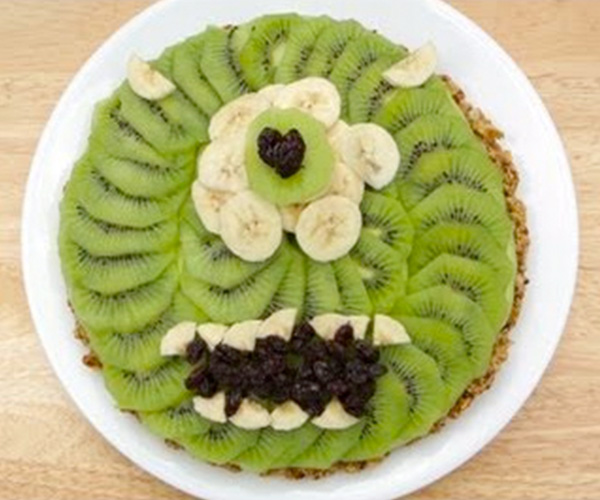
Monster Pie
Kids will love this Monsters, Inc. tart because it’s so darn cute, and well, because it’s dessert! Visit Creative and Healthy Fun Food to get this recipe that’s got a filling made from avocado, banana, and almond milk!
Kids will love this Monsters, Inc. tart because it’s so darn cute, and well, because it’s dessert! Visit Creative and Healthy Fun Food to get this recipe that’s got a filling made from avocado, banana, and almond milk!
Spooky Spider Eggs
Deviled eggs get extra creepy-crawly when they’re topped with spiders. To make eight scary spider eggs, cut 12 black olives in half vertically. Place one half in the center of each egg to form the body, then slice each remaining olive half into four sections to create legs. Shiver.

Deviled eggs get extra creepy-crawly when they’re topped with spiders. To make eight scary spider eggs, cut 12 black olives in half vertically. Place one half in the center of each egg to form the body, then slice each remaining olive half into four sections to create legs. Shiver.
Ghoulish Hard-Boiled Eggs
Let your kids in on the decorating fun! Use black foodsafe ink pens to draw ghostly faces on white hard-boiled eggs. This example from Wit & Whistle shows how simple – and cute! – each drawing can be.

Let your kids in on the decorating fun! Use black foodsafe ink pens to draw ghostly faces on white hard-boiled eggs. This example from Wit & Whistle shows how simple – and cute! – each drawing can be.
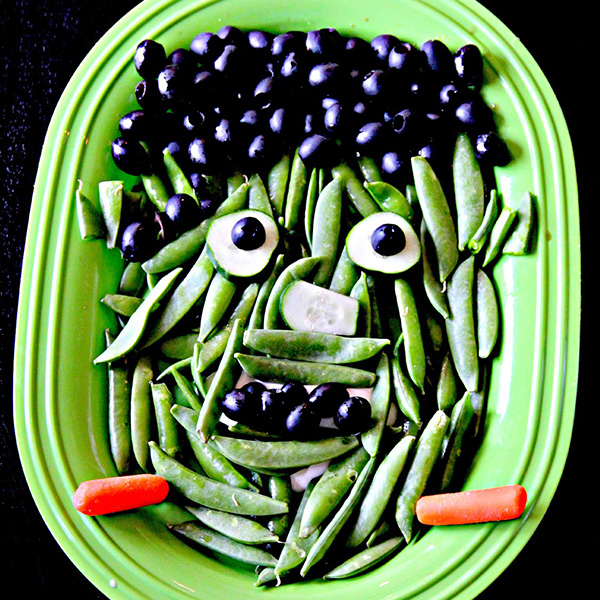
Frankenstein’s Monster
Is this a trick or a treat? This veggie tray made to look like Frankenstein’s monster is a little bit of both. Let your kids play with their food to help create this healthy platter and they might just be tricked into eating their veggies.
Is this a trick or a treat? This veggie tray made to look like Frankenstein’s monster is a little bit of both. Let your kids play with their food to help create this healthy platter and they might just be tricked into eating their veggies.
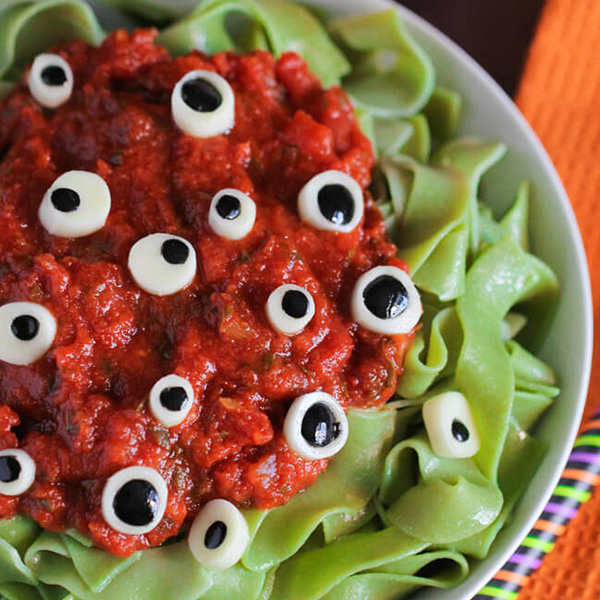
Eyeball Pasta
Start off a night of trick-or-treating with this clever eyeball pasta! Visit Spend with Pennies to see how she used string cheese, black olives, and a straw to create eyeballs of different sizes that stare out of ghoulishly green spinach pasta.
Start off a night of trick-or-treating with this clever eyeball pasta! Visit Spend with Pennies to see how she used string cheese, black olives, and a straw to create eyeballs of different sizes that stare out of ghoulishly green spinach pasta.
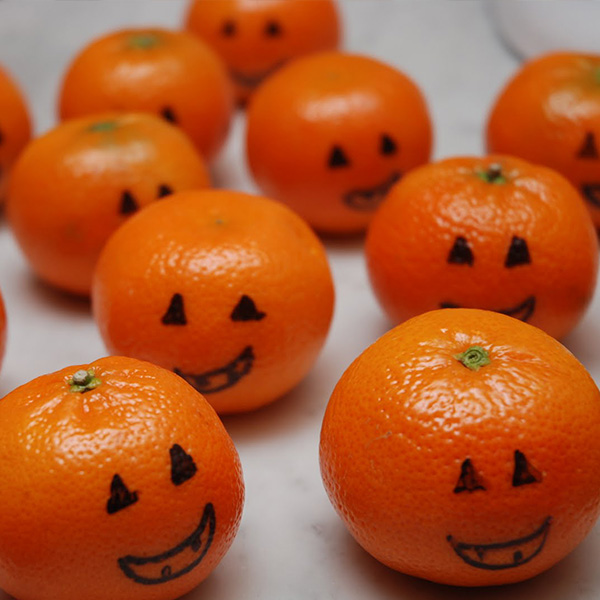
Jack-o-’Lantern Clementines
Pick up a foodsafe pen and the whole family can have fun decorating the skin of clementines, tangerines, or oranges with spooky or smiling faces. Pop these into lunch boxes the week leading up to Halloween.
Pick up a foodsafe pen and the whole family can have fun decorating the skin of clementines, tangerines, or oranges with spooky or smiling faces. Pop these into lunch boxes the week leading up to Halloween.
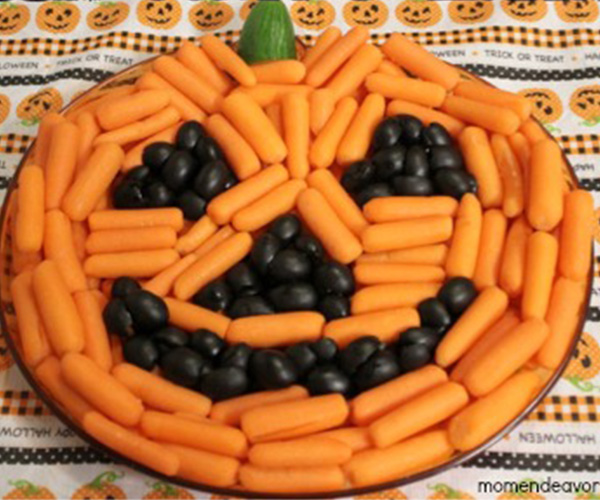
Pumpkin Veggie Tray
This veggie platter is a Halloween party essential! Mom Endeavors shares some tips for constructing this spooky pumpkin from baby carrots and black olives. The stem can be made from broccoli, the end of cucumber, or a celery stick. Serve with Slithering Snake Dip!
This veggie platter is a Halloween party essential! Mom Endeavors shares some tips for constructing this spooky pumpkin from baby carrots and black olives. The stem can be made from broccoli, the end of cucumber, or a celery stick. Serve with Slithering Snake Dip!
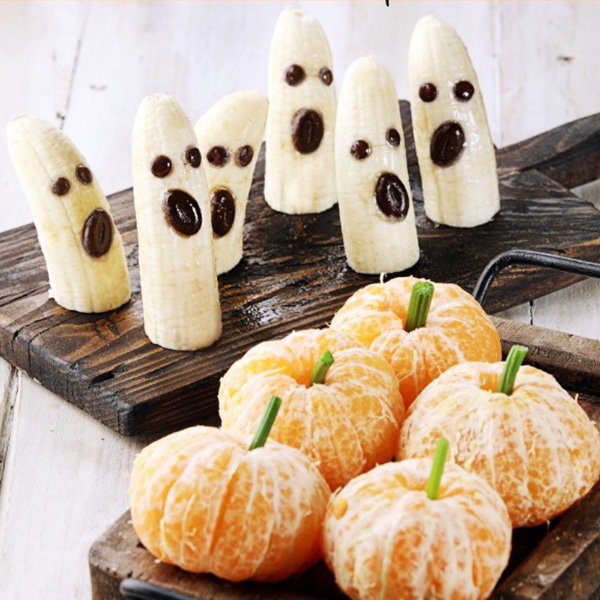
Banana Ghosts and Orange Pumpkins
Boo! Turn bananas into spooky ghosts with chocolate chip eyes and mouths made from chocolate covered raisins. Make a pumpkin patch out of peeled clementines or tangerines. Just use a sprig of celery in the center for the stem!
Boo! Turn bananas into spooky ghosts with chocolate chip eyes and mouths made from chocolate covered raisins. Make a pumpkin patch out of peeled clementines or tangerines. Just use a sprig of celery in the center for the stem!
Via the Team Beachbody blog with photos by Mom Endeavors, Princess and the Frog Blog, Spend with Pennies, Blue Skies Ahead, Wit & Whistle, Creative and Healthy Fun Food, Marci Combs, Chew Chew Mama, Cute Food for Kids, Frugal Coupon Living and Amanda Meixner!


